How To Become A Competitive Archer

Our very own James carrying arrows back from the target.

Given that this summer is a turning out to be a wonderful season for sport, such as the Archery World Cup in Odense later this year, we decided to take a closer look at how you can join your sporting heroes and become a competitive archer……

Types Of Competitive Archery – Target Archery

First of all, it’s important to note that there are several different types of competitive archery. There’s World Archery Federation rules, formerly known as Federation Internationale de Tir a l’Arc or FITA style archery. WA rules are covered by ArcheryGB in the UK. This is what is used in major international tournaments like the Commonwealth Games, and it comes under the bracket of modern ‘Target Archery’.

This type of archery is relatively new in the lineage of this historic sport, and comes in different forms. WA archery can take place in indoor competitive spares or outdoors, with the former taking place over distances of 18 to 25 metres. Outdoor competitions vary in distance from 30 through to 90 metres. Two types of bows are typically used, either recurve or compound bows.

The competition is divided up into what are known as ‘ends’, sets of arrows which are fired in groups of 3 to 6,  and within a fixed amount of time. The targets they are aiming for are made up of 10 circles arranged inside one another, and valued from one through to ten. The central ring is also known as the X ring, and is valued at 10.

The base for archery targets is made up of cloth stuffed bags or foam. They vary in diameter, from 40 centimeters, which is used in 18 metres indoor competitions, to 122 centimeters, which is used in 70 to 90 meters WA competitions, such as the Commonwealth games and other major sporting events.

Field Archery

This form of competitive archery harks back to older versions of the sport, and as such, takes place outside, often in territory which is unmarked, over a variety of distances. The major body governing this sport is NFAS (National Field Archery Society) in the UK, and NFAA in the USA.

NFAS operate their competitions typically in woodland, over distances which are unknown, and aimed at 3d targets and paper animal targets. They use 10 types of bow, including longbow, crossbow, compound limited and barebow, and cover adult, junior and under 12s, holding events up and down the UK.

Clout Archery

This runs along GNAS (Grand National Archery Society a.k.a ArcheryGB) rules in the United Kingdom. It’s similar to traditional target archery.

The basic idea is to drop arrows over a long distance into a series of circles, arranged inside one another, around a flag which marks the centre. The Clout in the name consists of the 36 arrows which

A recurve bow, with sights, in action

are fired in a group, as part of the competition.

Getting Involved

Unsurprisingly, the best way to get involved with competitions is via the relevant UK body. ArcheryGB has 45,000 members and represents 1,300 clubs. It is the national governing body for the sport from grass roots to elite competition level, and runs a variety of courses from beginners to coaching and advanced level. To get started, you can use their Club Finder. These provide a good starting point for both recreational and competitive archery. There is support for disabled archers.

Meanwhile, NFAS focuses on promoting traditional field archery as a sport, from shooting events, all the way up to coach training and competitions. As with ArcheryGB, you can apply to be a member on their website.

Grab Your Gear

Archery equipment can be hired from a variety of sources if you just want a taste – clubs can often help with this. Those who wish to commit to the sport will find affordable entry level equipment for around £100 to £300, with second hand equipment also available from a variety of sources (it’s best to have this checked by a professional before purchasing). You can contact our staff via telephone or email for advice on what archery supplies to get.

James from the Pellpax team takes aim

Stay Informed

In order to become the best, you’ll need to keep up to date with the biggest names and the best writing on archery. We regularly publish archery content here at Pellpax on our blog, and you can also head to the ArcheryGB website, which is regularly updated with news about the sport. They also produce Archery UK, their own magazine. Then there’s Archery360, which produces great content, and Bow International, another fantastic resource for archers.

Events

For a calendar of the big sporting events this year, including the World Archery Cup, which takes place in Odense in September, check out this guide provided by the World Archery Federation. Big events also take place in Dublin, Marrakesh, Bangkok, Shanghai and Las Vegas in 2016, too.

Stay tuned to our blog to learn about all things archery-related. And grab all your archery supplies from compound and recurve bows, to archery targets, quivers and more, in our archery store. 

How to Get Into Archery for Beginners

James from the Pellpax team takes aim

This summer will see many new enthusiasts for the sport of archery, so if you’ve discovered a newfound passion for this activity, then read on to find out how you can get involved….

All forms of archery in the UK are under governance of ArcheryGB, which is affiliated to the World Archery Federation – formerly FITA (Fédération Internationale de Tir à l’Arc) and is a member of the British Olympic Association. The very first archery society was founded in 1537, under the direction of Henry VIII, and by the 1600s, archery was established as a competitive sport.

Archery GB

Contacting Archery GB (http://www.archerygb.org) is a good first step to learning archery. The website provides information about clubs, competitions, and courses. You don’t have to be a member of Archery GB to take part in the sport, but there are advantages. As a member, you are eligible to enter its regional and national tournaments and to attend its training courses (although not all of the courses are exclusive to members). There is also subscription to a quarterly magazine, Archery UK.

Field Archery

Field archery involves an exciting trek through woodland and open countryside, shooting at a series of archery targets from designated positions. These targets can be flat or three dimensional, upright or tilted, small or large, and at short or long distances. The archer might be shooting among trees, on a slope, across a pond, or from a gulley – you could be shooting from rocky or muddy terrain, in rain or wind, bright sunlight or semi-darkness.

Outdoor Target Archery

This is the most popular discipline in the UK. Archers shoot at circular, colour-coded targets – each colour representing two scores. The white (outer) ring is one and two, the black, three and four, the blue, five and six, the red, seven and eight, and the gold (centre) ring is nine and ten; the bullseye (10) is 2cm in diameter. Outdoor archery targets are at distances ranging from 40 yards (37m) to

A bow and arrow
A bow and arrow

100 yards (91m) for seniors, and from ten yards (9m) to 80 yards (73m) for juniors. In a competition, each archer will shoot ten ends of six arrows, thereby shooting 60 arrows in all. The maximum score for an end is 60 points.

Indoor Target Archery

Indoor target archery is popular during the winter months. Archers shoot at a standard ten-ring target at a distance of 20 yards (18m). Like outdoor archery, both recurve and compound bows are used for the indoor sport.

Flight Archery

Flight Archery – a rare sport in the UK – is about shooting your arrows as far as you can. The obvious problem with this sport is that there are so few places it can be played. A target is, by definition, a stop for a potentially lethal projectile. It’s a challenge to find a suitable venue for flight archery!

Archery in Schools

Archery GB is working in conjunction with School Games to introduce schoolchildren to archery, offering opportunities for intra- and inter-school competition. For dedicated youngsters, there is even the chance of competing on a national level. “We believe that by supporting schools and their networks to deliver the School Games, more young people will also be introduced to archery and enjoy further opportunities through clubs.” Archery GB.

Archery GB Courses

When you join an archery club as a novice, you will likely be required to take part in a beginners’ course consisting of four to six introductory lessons, delivered by a qualified coach. The club’s Archery GB insurance covers new members for the first six lessons that they receive at the club, but after that, if you choose to continue with archery, you will need to join the club or Archery GB. Many people, of course, join both.

The Archery GB Instructor Award is designed for people working in educational environments, and for those who work in recreation and leisure. This basic, entry-level course focusses on training both experienced and novice archers to deliver safe and enjoyable introductory archery sessions.

Level 1 Award in Coaching Archery trains an archer to deliver a course for beginners and includes 12 hours’ supported practice (coaching at your own club, for example) and an assessment delivered over a 12-week period.

Level 2 Award in Coaching Archery is for Archery GB Level 1 coaches. This course teaches participants to deliver a club coaching programme, take responsibility for beginners’ courses, prepare archers for their first competitions, and to manage, mentor and support Level 1 coaches.

Archery Equipment

The oldest form of bow is the longbow, and it is still a favourite of many archers today. From about 3500 BC, the longbow was established as the Egyptians’ primary weapon of war. In the 13th and 14th centuries, longbow-men were the core of the English Army, but during the 16th century, the invention of firearms meant the decline of the bow and arrow as a war weapon.

The recurve bow is the most popular kind of bow, and the only form to be used in most world archery competitions. It’s essentially a bow with limbs that curve away from the archer when unstrung. It was invented by the Assyrians in about 1800 BC – the early models being made of wood, horn, and leather. Shorter than a longbow, the recurve bow proved to be a handy weapon to use whilst racing around in chariots. At Pellpax, we have a wide range of recurve bows and accessories in our archery shop.

Another popular type of the bow is the compound bow, which was first developed by an American, Holless Wilbur Allen, in 1966. Working on a pulley / cam system, the bow provides a mechanical advantage to the archer, allowing the limbs of the bow to be more rigid and therefore more energy efficient than those of the longbow or recurve bow. At Pellpax, we have a wide range of compound bows and accessories.

Meanwhile, the crossbow – a short bow mounted on a stock – originated in China during the sixth century BC. The projectiles are called bolts (or quarrels), fired from a string which is released by a trigger. The crossbow is a silent, powerful, and accurate hunting tool (outside of the UK), as well as a popular discipline within competitive archery. At Pellpax, we have a wide range of crossbows for sale and accessories, which you can check out here.

Head to the ArcheryGB website to learn more about archery. Or check out our extensive range of crossbows for sale, archery accessories and other goods in our archery shop

Airgun Shooting For Beginners

IMG_20160413_153255If you’ve ever fancied getting started in the world of shooting, it’s probably easier than you first thought. Let us help you with this handy guide to starting out…

First off, you have to be over the age of 18 to purchase an air rifle or air pistol, and have valid photo ID (passport / driving licence) to prove this when you purchase from a shop.  If you want to buy online, We’re one of the very few internet retailers that deliver to item to your door. Secondly, the rifle or pistol has to be below 12 ft/lbs, which is the legal limit for air weapons which don’t require a license. If you take a look in our Airguns category, then everything within there is below this limit, so they only governing factor now is your budget!

The Sport of Shooting

The sport of shooting has more benefits for it that you may think, and is by no means reserved for the upper class, as many believe it is today. Air rifles and air pistols are a low cost form of shooting, and there are many local clubs which have large memberships in the disciplines of Field Target and Hunter Field Target shooting. If you fancy joining one of these clubs, a couple of great websites to check out are www.shootingclubdirectory.com and basc.org.uk/airgunning, which have details of numerous air gun clubs across the UK that would be more than happy to accommodate new members.

Of course you don’t have to be a member of a club to shoot; you can quite as easily purchase several targets and shoot on your own land. A wide range of targets are available such as knockdowns, knock and resets, and standard paper targets. You can take a look at our full selection of shooting targets here and start building your own home range today!

A lot of air rifle users also use these weapons for pest and vermin control, such as rabbits and squirrels. They present the hardest of targets as they are prone to rapid movement, and shot placement must be spot on to ensure a humane kill.

All these targets and practicing target acquisition massively improves your hand eye coordination, steadiness and sense of distance which can benefit you greatly in day to day tasks.

The Law

The law is very clear on Airguns; they are classed as a firearm and hence carry heavy penalties for misuse. For this reason you must ensure that you comply at all times, which means you must first know the law.

The Law is split down into different age groups as follows…

If you’re over the age of 18 then there are no restrictions on you purchasing an air rifle and ammunition, but you must only use it on land which you own, or have permission to shoot on. If you do get some land to shoot on with permission, I would suggest getting it in writing, as well as a map of where you are allowed to shoot. You must also remember that whilst shooting, no projectiles must leave the boundary of the land, so know your boundaries!

If you’re between the ages of 14 and 17 years old, then you can borrow an air rifle and ammunition, and use it without supervision on private premises where you have permission to do so. At this age you can’t hire or buy an air rifle, buy ammunition, or receive one as a gift. Everything must be looked after by someone over the age of 18 such as a parent, guardian or other responsible adult. You also cannot have an air rifle in a public place unless you’re with someone over the age of 21 and have a reasonable grounds to do so, such as traveling to a shooting club.

The final age group is 14 years and younger. In this age group you can use an air rifle on private land with permission, but you must always be supervised by a person over the age of 21. You can’t buy or hire an air gun or ammunition, nor receive one as a gift, and those who do buy an airgun for use for someone below the age of 14 must be sure to exercise control over it at all times.

Air Gun Power Plants

When it comes to choosing either an air rifle or air pistol, there are a few different power sources to choose from, and each has advantages and disadvantages. This is just a quick rundown on them, but for a deeper insight, check out our blog post from our Gun Smith Jason here.

Spring power is the cheapest and easiest to use as it consists of a large spring moving a piston within a chamber to compress air in front of it to move the pellet along the barrel. These guns require very little maintenance and only need the movement of you cocking the barrel to make them ready for firing. They also don’t require any other accessories. Spring guns do have recoil though, but this can be seen as an advantage, as it teaches you how to correctly hold the gun to deal with this, henceforth improving your skills right away.

Co2 power utilises Co2 canisters which come in a couple of sizes. These are loaded into the gun, which is then released through a valve, into the barrel upon each shot. This method reduces the recoil to practically nothing, as well as cutting down on the noise from the action. This means in most cases that a silencer can be fitted to reduce the overall noise of shooting. However, Co2 does suffer from power fluctuations with the temperature, and requires you to carry spare capsules for reloading when they run out.

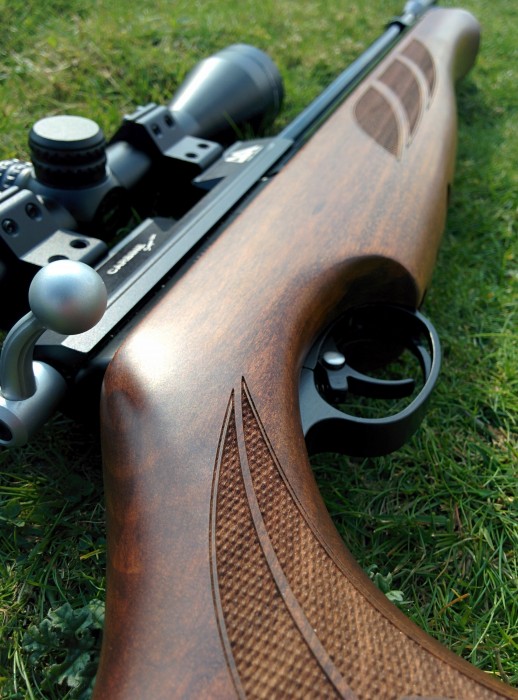
PCP stands for Pre Charged Pneumatic and these guns are based around an air reservoir, which is refilled with a dive bottle or stirrup pump up to pressures of 200 BAR. This high pressure air is then allowed through to the barrel through a valve. The use of high pressure air provides excellent accuracy and consistency and similar to the Co2 guns, and a silencer can be used to reduce the barrel noise. The drawback of PCP is that they are expensive to buy, particularly with the accessories, but once set up they are phenomenally accurate and simple to use which makes them the number one choice for top end competition and match purposes.

What do I need to get started?

To get started you need as little as an air gun, either a rifle or pistol, the necessary pellets, and other essential accessories such as co2 capsules, where required, of course.

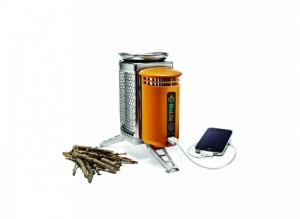
Here at Pellpax we have a few kits that we have put together at a great price to get you started. One such kit is the Wildcat Kit which comes with the rifle, scope, a gun bag, a tin of pellets and a pack of our targets. Everything you need to start punching holes in paper as soon as it is delivered.

Once you have your selected item, then it’s time to start shooting! As both of these are break barrel items, you first have to tap the barrel to break it away from the breech, then grasp the barrel firmly and pull it towards you to cock it until it clicks. Then load the pellet into the barrel and return it to its starting position.

Basic Technique

Firstly, take aim at your target. with the air rifle the best technique is to not hold the stock too firmly, as you need to allow the rifle some room to recoil slightly. With a loose hold on the rifle, disengage the safety, and slowly squeeze the trigger until the shot fires.

With the pistol it is much the same, except you will need to hold it slightly tighter to support its weight, and feel free to use both hands, one round the grip and one supporting the front of the pistol to get the best accuracy. Enjoy!

From here it is really down to you developing your technique over time and fine tuning the scope / sights and practicing hitting the centre of the target and learning your gun. Of course you might consider upgrading over time to a high quality rifle, but these basic tips and kit are a great place to start.

You can grab a Pellpax Wildcat kit here.

Our Spring powered air rifles can be found here. Our Co2 air rifles are here, and our PCP air rifles can be found here. 
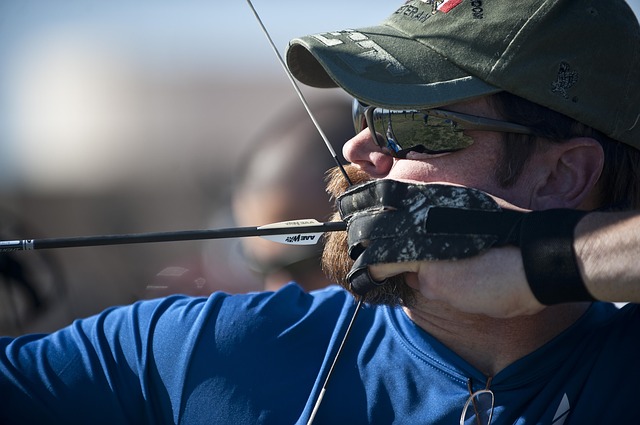
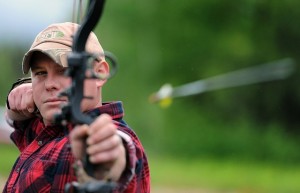
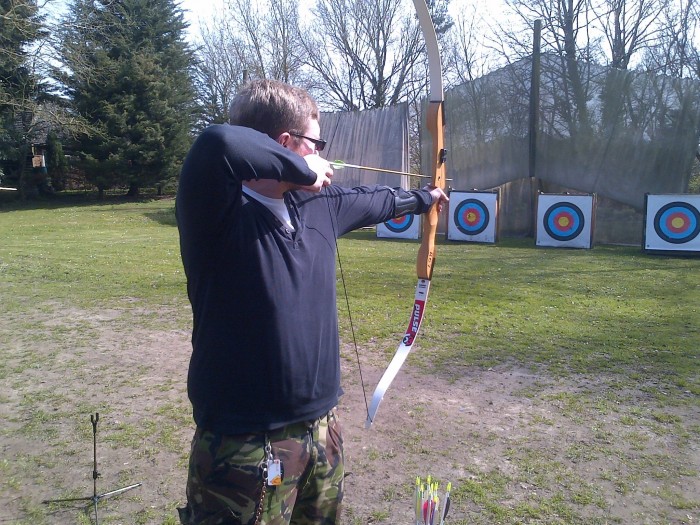
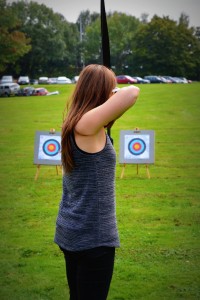
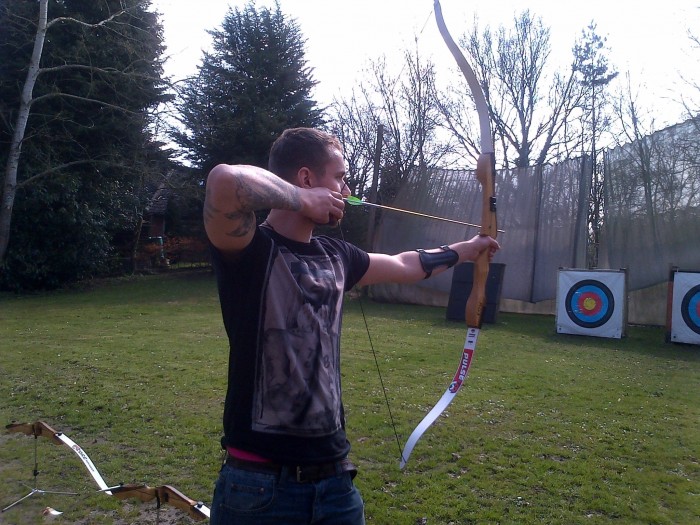
Ten Top Bushcraft Survival & Supplies Tips

 If you’re passionate about the outdoors and want to learn more about survival skills and bushcraft, then this short primer will help to give you a few pointers on how to fend for yourself, and enjoy those nights under the stars.

Corkscrew

sportsman by victorinox
The Sportsman by Victorinox is a versatile multi tool.

The tighter the knot, the stronger it holds. But the tighter the knot, the harder it is to undo! The corkscrew on the Sportsman by Victorinox is the perfect tool for undoing tight knots. Weave the corkscrew into the knot and coax the threads apart.

Clamps

A useful component of a survival kit is a handful of heavy-duty tarpaulin clamps with metal eyelets. Taking a firm grip on fabric, these clamps add stability to a tent in bad weather or provide anchorage for a makeshift shelter.

Water Strainer

If there is no clear water to be found, use a tightly woven piece of cotton fabric, like a T-shirt or bandana, to strain mucky water. The cloth can be repeatedly rinsed and reused.

Honey

A gauze pad spread with honey is an excellent dressing for infections and burns. Honey is antibacterial, antiviral, and anti-fungal. Dr Susan Meschwitz, who led research into the healing properties of honey, said, “The unique property of honey lies in its ability to fight infection on multiple levels.” In cold weather, though, honey will crystallise and will have to be warmed before use.

biolite-camp-stove
The Biolite CampStove has all kinds of uses.

Firelighters

Commercial firelighters take up quite a bit of space when you’re travelling light. Here are some superb ideas for homemade (and cheap) firelighters. Save remnants of wax candles and melt them over a BioLite CampStove, which is fuelled by twigs and pieces of wood. Coat some cotton pads or cardboard strips with the molten wax. When the wax has set, keep these firelighters in a watertight bag until they are needed.

Root cordage

When in need of emergency rope, excavate the thinner tree roots that are to be found near the surface of the soil. Strip off the bark, and the roots can be used straight away for binding. The Classic SD by Victorinox is a handy tool to carry with you for this type of work, along with the Blademedic Knife Sharpener. For tighter binding, the root will need to be dried out first, but wet it before use to make it more flexible.

Bark cordage

For finer, intricate binding, cut strips of willow bark, scrape off the outer bark, and keep these scrapings. Put the strips of inner bark into a pan of water with some wood ash and the saved scrapings of outer bark, and simmer for at least 45 minutes. The strips will now be flexible and durable.

Collecting dew

One of the simplest ways to collect water – when there is a shortage – is to lay a piece of cotton fabric (a tea shirt, for example) over dew-covered vegetation and squeeze the collected water into a container. It is advisable to boil the water before drinking it.

lineaeffe-11-tool-multitool
The Lineaeffe Multitool is an excellent piece of kit for survival in the outdoors.

Steamed fish

Make up a hot fire with a good bed of embers. Lay a piece of moss turf on the fire, green side up. Put your gutted and cleaned fish (the Lineaeffe Multitool is a superb bit of kit for this purpose) on the moss, and cover them with another lump of moss, green side down. Leave your fish to steam for about 30 minutes, sandwiched within the moss.

Treatment of diarrhoea

Ingest ground charcoal, which can absorb more than twice its own mass in toxins. To make charcoal, put soft wood into a closed tin. Punch a hole in the top of the tin and put it into a fire, allowing the wood to burn in an oxygen-free environment. When no more smoke is coming out of the hole, remove the tin from the fire and allow it to cool. Grind the charcoal, mix it with water, and drink it. It’s an effective (and by all accounts horrible) treatment of diarrhoea.

Subscribe to our email news letter for more top tips on airgunning, archery, bushcraft, and much more. For all of your survival supplies and equipment needs, check out our online bushcraft store.

Top Tips For Shooting A Recurve Bow

Are you thinking about getting into archery? Our resident archery enthusiast James gives us his advice on how to fire a recurve bow.

archery-660632_640
Target archers use aids like sights to help them achieve the perfect shot

In my experience, there are various different ways in which you can shoot a bow depending on your style of archery. For instance, an archer using bare bow style, a recurve without the use of sights, counterweights etc, may “snap shoot” where you use very little time to actually aim at the desired target but instead instinctively “feel” the shot.

A target archer using sights however, will take more time and think about where the arrow is going, ensuring all the possibilities that could make the shot go wrong are limited by using the same methods every time, such as draw length, stability, a smooth release etc..

Here I am going to cover some of the basic techniques that are required when shooting with a recurve bow. These are basic tips to help you achieve a consistent level of archery so if you use sights or shoot bare bow style, this advice should hopefully help you get you on your way to successful shooting.

Your Archery Stance

One of the first things to consider after you’ve got your archery supplies, when shooting any bow, is the way in which you stand when doing so. You should be standing sideways on towards the target, with your feet shoulder width apart. This will give you stability when shooting and ensure you are able to get the most power out of your shot, for you will now be drawing the bowstring straight across your body to your draw point.

Holding the Bow

It is important that you hold the bow correctly because this can have a huge impact on the shot you are taking. Personally, I don’t use an armguard when shooting, and I would recommend this to any beginner. This is because as long as you have you arm in the correct position when shooting; the bow string won’t hit your arm.

If your hold is incorrect, you arm will feel the recoil of the string, and this can become quite painful over time, as your arms becomes more sore. In this way, bad technique is punished, and you are encouraged to get it right. Instead, the right way is to not to have your arm dead straight, but in fact with a slight bend at the elbow and locking this position in place.

Gripping the Riser

Another thing to consider is how hard you need to grip the bow. If you are clutching the riser for dear life then this can dramatically throw the arrow off to either side of the target. This is to do with how the energy from the bow is displaced and when held too tightly the energy from releasing the string will all be put into the back of the arrow making it “fish tail” thus loosing accuracy.

This is why many target archers will use finger or wrist slings, so the bow may be gripped ever so lightly and allowed to dip forward after every shot without dropping the bow.

archery-660626_640
It’s important to get your drawing technique right

The Draw 

As a budding archer, you must decide for yourself the most comfortable way to draw the string back, and there are various schools of thought on this. Many who teach archery to people will say to put three fingers under the arrow because this is the easiest way of doing so (Three fingers being your index, middle and ring finger).

A better and more widely used method by both target archers and hunters is to “split” your fingers by having one above and two below. This is where the index finger is above where the arrow is on the string with the middle and ring finger below. Also, your fingers will need to be gripping the string at your first knuckle to ensure you aren’t holding too loose or too firmly.

Bare Bow vs Target Archery Drawing

When it comes to drawing, the differences in target and bare bow recurve shooting become starkly apparent. As a barebow shooter, with the bow lightly held in place, you will draw to the side of your face so as to almost touch your cheek with your fingertips, looking down the arrow towards the archery target you wish to hit.

A target archer however will use a different technique where you will draw the bow under your chin so your fingers use your chin as an “anchor-point” and the bowstring touches your nose. This is so that the archer may use the sight to aim at the target before shooting.

Another thing to consider when drawing is to keep your elbow on the arm which is drawing the string held nice and high, as this will make it easier when releasing the shot to keep power.

Releasing The Bow String

Whatever style of shooting, a good release is essential to ensuring a powerful and accurate shot. If on releasing the string you simply let go of the string and let your hand follow the shot, a lot of power will be lost each time. The likely result will be either that the arrow hits low on the target and without much consistency, or that you miss the target altogether.

Instead, ideally, you want a powerful release. So when you are lined up and ready to shoot the arrow when letting go of the string, you should “flick” your fingers off. This is done by releasing the string whilst at the same time moving your hand backwards away from the bow. Imagine you were plucking a guitar string or pinging an elastic band. This will ensure all the energy from the bow is put into shooting the arrow powerfully and accurately.

Keep Holding On

Upon release it is also important that you continue to hold your bow up until the arrow actually hits the target. If you were to just let your arm drop as soon as you release the string you will find that most of your shots when doing so will shoot low on the target or even miss under the archery target. So it is very important to let the shot follow through until it reaches its destination.

Finally

I can’t tell you what exact technique is going to work for you, because we all differ. It is impossible to generalise, and there are too many variables in archery. I wish it could be worked out, as this would have helped me a great deal when I was learning! Instead, what I have given you here are guidelines to which, if implemented, will help you to progress. In order to make the most of these, you will need to practice, apply yourself, and try different methods. With some effort, you should find what works for you, and gives the best results when shooting.

To check out our full range of recurve bows and accessories, head to our archery supplies store. 

Review: Clay Pigeon Shooting Training Day

If you’re interested in learning about using a shotgun, A great way to begin shooting is with a beginners course or some assisted training from an instructor. Our resident shooting journalist Hazel Randall tried out one such course, heading out for some instruction from Alan Evans of Fair Clay Targets.

Clay Pigeon Shooting. Credit: Dennis van Zuijlekom, 'Barrage'.
Clay Pigeon Shooting. Credit: Dennis van Zuijlekom, ‘Barrage’.

I arrived at my destination with a hammering heart and a sense of dread. My life-long fear of guns – including toy ones, which, pointed at my body, can induce in me a shameful hysteria – was kicking against the whole idea. As I shook hands with Alan Evans, of Fair Clay Targets, I put on what I hoped was a brave face.

Alan was just as I expected him to be – tall, friendly, and relaxed. My nerves subsided a little. He led me to a wooden table, where a double-barrelled, over-&-under 12-bore shotgun lay open. Alan showed me that there was no cartridge in the opened barrel. He put one into the chamber, and then he took it out again.

Having established that there was no ammunition in the gun, and that death was not imminent, Alan closed the barrel and got me to hold the gun. He showed me how to tuck the stock (I’d always called it the ‘handle’) into my right armpit, support the fore-end with my left hand, and push the lever with my right thumb to open the barrel. I then closed the barrel. I did this a few times, growing a little more comfortable.

Holding the gun

The next step was to learn how to hold the gun. I was shown how to push the butt into my right shoulder, supporting the fore-end with my left hand. Throughout the session, I made the mistake of positioning my hand too far forward, restricting the movement of the barrel when aiming. With right hand on the grip, forefinger on the trigger, and cheek nestled into position directly over my left foot, I stood side-on to my ‘target’ (Alan’s right eye). Cross-eyed and a little shaky, I tried to position the tiny white sight at the end of the barrel over my target. I was glad when that bit was over.

My heart rate rose again when we went over to the cage from which I was to shoot. Immediately in front of it, a rope ran the width of the field. I was told to stay behind the rope. Alan operated the trap from where we stood, pulling a couple of clays so that I knew what to expect. These clays, flying onto a background of trees, were bright orange, showing up well against the dark backdrop. The trap from the other end of the field fired black clays towards us; these were easily seen against the sky. Alan told me that the clays were biodegradable, and the debris was left where it fell, to decompose within a couple of weeks. I thought that was pretty marvellous. Alan gave me some ear protection to put on. It was time to shoot.

I opened the barrel, and Alan slipped a 24-gram shot cartridge into one of the chambers. Now the adrenalin was racing through my body. That first shot (which missed, obviously!) thrust the butt into my shoulder, and the bang filled my head. It was exhilarating. I liked the smell of the sizzling fumes that curled out of the chamber after the remains of the cartridge had popped out.

Following the clay

I found it difficult to follow the clays with my eyes and the barrel simultaneously, often holding the gun in a fixed position while my gaze wandered over the sky. Because my face was not hugged firmly into the barrel, my head tended to jerk backwards, throwing me off balance and the gun off target.

Thanks to Alan’s patience and expertise, my first experience of using a gun was an enjoyable one. The session ended with a strong, sweet cup of coffee and a biscuit, and the day ended with an almighty headache!

For more details of other approved courses nationwide, head to the BASC website. And check out our range of shotguns for sale, including pump action shotguns, and shotgun accessories like ear defenders, and delivery across the UK.

How To Get Started With Clay Pigeon Shooting

You don’t own a gun. You have never fired a gun. You have no gun licence. You don’t know how to obtain a licence. You don’t know if you need a licence. You don’t know anybody who shoots. So how do you get started with clay pigeon shooting?

Clay Pigeon Shooting. Credit: Dennis van Zuijlekom, 'Barrage'.
Clay Pigeon Shooting. Credit: Dennis van Zuijlekom, ‘Barrage’.

When you attend your introductory shooting lesson, you don’t need a licence or a gun of your own. Current legislation allows an unlicensed person to borrow a gun belonging to the occupier (not necessarily the owner, but a licensed person) of privately owned land, in his or her presence.

Do I need a licence?

However, it is a legal requirement that anybody who owns a shotgun must hold an up-to-date licence. A first shotgun licence, valid for five years and issued by the Firearms Licensing Unit of the local police force, can be obtained at a cost of £79.50 on completion of an application form (201) and a follow-up interview with a police officer. Form 201, application for a firearm and / or a shotgun licence, can be downloaded from various websites, including the BASC (British Association for Shooting and Conservation), Shooting UK (a popular UK shooting website), and your local police force’s website. A shotgun licence application can take months – or as little as three weeks; it depends on whereabouts in the country you live. We’ve written a detailed blog post on the topic here.

Where can I practise clay pigeon shooting?

trap clay pigeon shooting club
Clay Pigeon Trap Shooting can be found in local clubs around the country.

There are over 500 clay pigeon shooting clubs in the UK, including 11 in Norfolk. You can find your local club by heading over to the Clay Pigeon Shooting Association. Check out our site for all your shooting accessories. Contact a club near you and book yourself onto a clay pigeon shooter beginner’s session, where you will be coached in technique, gun safety, site safety … and jargon, of course!

As a beginner, you will use a gun with a fitted recoil pad. Recoil (also known as knockback, kickback or kick) is the backward momentum of the gun when it is discharged. Being of equal force to the projectile (plus any ejected gases), the recoil is, understandably, quite a shock for a first-time shooter. Recoil pads are made from a soft material, e.g. rubber or leather, and are attached to the buttstock of the gun or strapped onto the shooter’s shoulder, which also serves to prevent the gun from slipping on clothing.

And what about clothing and essential shooting supplies?

Wear comfortable, safe shoes. Wellington boots are ideal in wet weather, and in drier conditions, walking boots or trainers are suitable. Ensure that laces are securely tied. Well-fitting clothes are essential. Tight clothing will obviously restrict movement, but baggy clothing, too, is restrictive in its tendency to get in the way.

The wearing of adequate and effective eye protection by shooters and trappers is now mandatory. It’s possible to wear additional eye protection over the top of prescription glasses; however, many people find this physically uncomfortable and a visual hindrance. As glasses are considered ‘adequate and effective’ protection, people often choose to wear either their own glasses or special eye protection.

It is advisable to wear some form of hearing protection is also compulsory when clay pigeon shooting. A discharging gun is extremely loud, and eardrum damage is irreversible. Check out advice from the Clay Pigeon Shooting Association for more advice on the exact guidelines;

You can find the BASC website here to get your Form 201. Detailed instructions on how to apply for a certificate can be found here. And guidance from the Clay Pigeon Shooting Association is available here

If you already have your certificate, you can grab shooting supplies in our Shotgun store, and shooting accessories such as shotgun cartridges here.

And head to the Clay Pigeon Shooting Association, where you can find a club near you. 

Adventures In Airsoft: What Is MilSim?

A Milsim squad out in action

One of the keys to practicing Airsoft is MilSim – the highly realistic military simulations that make for a typical weekend of airsofting. Here we explain the terminology, gear, and what you can expect….

Before we go straight into talking about MilSim we need to determine what it is and why it takes place. MilSim is an abbreviation for Military Simulation and it comes in 2 types: entertainment / war games or re-enactment. Out of the two, war games tend to be the more popular because they don’t require lots of expensive equipment or experience.

MilSim is becoming increasing popular in America and Europe with hundreds of people turning up to take part in the games. I’m not a professional myself, although I do have a love for airsoft, so I’ve decided to share the basics with you about what you need to know, if you decide to participate in any of these milsim uk events.

Time to Gear up!

Probably the most important thing about MilSim is the equipment. Although a lot of people go and spend hundreds of pounds on equipment, it is not necessary for your first time. The best way to approach it is to buy the basics first, and after each event decide what was good, and what held you back during the games. Once you’ve identified these areas of improvement, then you can buy the accessories accordingly and prevent these problems re-occurring.

With that sorted, let’s talk about the basic equipment. Before assembling your loadout, you need to sort out your uniform and one important thing to note are restrictions. You won’t get told off for not polishing your shoes or wearing the wrong belt, but the organizers often put restrictions on the type of camouflage each team can wear. This helps each team identify friend or foe, and generally adds realism to the game. Some events go even further and ask you to match your gun according to the teams, but for lower grade MilSim this is rare.

You Need Good Footwear for Milsim

Don’t underestimate the importance of good footwear. The boots are as important as your BB pellets. I would not recommend wearing uncomfortable boots, or new boots to a MilSim, since blisters are a sure way to halt your fun. Make sure you have a pair you’re familiar with, and happy to wear for long periods of time. Two pairs of good quality walking socks are also something I’d recommend and should see you though the Games.     

What you choose to carry is purely down to what military role you want to play. If we’re talking about an average rifleman, you will be carrying around 5-7 magazines (including the one in your gun), an easily accessible radio and water. Most players like to wield a sidearm, typically a pistol but this is entirely up to you. Most MilSim games don’t allow you to reload your mags until you’re at a respawn point so carrying spare BBs is pointless. Finally, grenades are used by a number of players, and generally are fun to use. Again, there is a restriction on how many you carry, which is normally around six, but it’s always best to check with the organizers first.

Your gun is your trusty companion during these few days. There are three types of airsoft guns which include electric (often known as AEG), gas and spring. Spring isn’t used as often since they tend to be weaker and therefore can’t get the range required. Electric and gas are used the most due to their range and power, so if you plan to use these, ensure you have spare batteries or gas cans packed.

How to survive the next few days

Since these events last a few days, you will be required to take all your equipment with you. This includes sleeping bags, roll mats, clothes, grenades, guns, maps/intel etc.

Survival In The Elements: With Essential Nutrients like Milsim Food

An accessory that I would call a very smart investment is a patrol pack. This is a smaller bag that you can take with you when advancing, resupplying or guarding areas. Within these you typically put the essentials such as water, food and cooking equipment. You can also pack some form of thermals in case of a sudden temperature change.

Water is absolutely essential in these events. It doesn’t matter if the weather is like an Australian summer or a Russian winter you will be using plenty of this stuff, so take it! You will need it for drinking, cooking meals, washing up and cooling off. I would highly recommend refilling your canteens / water bottle at any chance you get and make sure everyone in your squad takes some to reduce the load.

When you take part in Milsim your will be burning a lot of calories and will get hungry quicker than usual. The running around and carrying of equipment soon takes its toll, so it’s best to be prepared. Small cookers are very handy whether they are gas or fuel. It would be wise to find a compact one and take it with you on your MilSim experience. I also pack a mess tin and use it for eating, cooking and washing up. Most people tend to take food packs with them although other alternatives are available.

What to expect on your first MilSim

When you first go to a MilSim event a lot of things will go through your head beside adrenaline. You will be getting briefs, being put into squads (expect to be bossed around a lot by the pros), assignments/missions will be handed out and loads more. This is all part of the fun and realism of MilSim and when all combined it aids the excitement of the event, no matter if you’re a MilSim veteran or a private. Even though these events are very tactical and physically straining, everyone is friendly and there for the same reason – to have a good time! The war games will be played in different areas depending on their location and organizer. Some are based outdoors on large areas of land, some are indoors with built scene and the best sort, in my opinion, are the ones based in abandoned facilities. The main thing to expect is lots of fun, excitement and a whole new experience of war games.

When you first go you will be trying new things, trying to find your role, play style and figuring out what’s going on. This is completely normal for a first timer and isn’t anything to worry about. The more you play the more you’ll learn and find out about yourself. I soon discovered my love for sniping, playing that support / cover role and making key decisions for my team.

The more MilSim events you attend your more people you’ll get to know, more gear you’ll acquire and you’ll start to get a feel for what sort of player you are. The biggest thing I notice is the different paces of these war games. Sometimes you will be stealthy and tactical like a spec ops group or you may just go in all guns blazing. The main things to remember is to have fun, play fair and enjoy this experience of a whole new level of airsoft.     

To find a registered airsoft game site near you, check out this list published by UKARA, the British body in charge of the sport.

To check out our range of airsoft gear including accessories, simply head to our Airsoft store, where you can grab airsoft guns, glasses, batteries, silencers, targets, and much more.

Tips For Shooting At Night with Scopes & Lamping

When hunting at night there are a two main things which must always be considered and upheld at all times: safety and the law.   

deer hunting texas wikipedia
Deer hunting at night. Source: Wikipedia

Unless you can obtain a special licence to cull deer at night, it is illegal to do so between one hour after sunset and one hour before sunrise. Game birds and hares also cannot be shot at night. Night shooting is generally used for population control of pests and certain predators such as foxes. You must also only shoot on land that you either own, or have permission to shoot on; shooting on land without permission is a serious offence and comes with heavy fines and even a custodial sentence.

A Rifle Scope is Essential

Generally, at night time, I would always recommend using either rifles or air rifles with scopes on, so that you can more easily identify both your target and where the shot could go afterwards. You should also never just shoot at a pair of eyes, through a scope or otherwise, as what you think could be a pair of rabbit eyes could be a pet, or even someone with binoculars observing animals at night.

It’s also strongly recommended that when shooting at night, you use a suppressor, so as not to make too much noise, which could disturb people in local houses trying to sleep, and scare nearby livestock.

At Pellpax we stock a large range of suppressors for air-guns and rifles alike. Click here for more in air rifle silencers. And here for more on Rifle sound moderators.

The view down a 4 x Scope

When shooting foxes, you must ensure that you’re using a calibre of rifle that is legal; generally, .22 Hornet or larger are favoured; air rifles and rim-fires are not legally permitted.


Using a scope at night can be hard work if your scope hasn’t got an IR (illuminated reticle), which is when your crosshair will clearly light up, making your point of aim much clearer. As well as this, you will also need a good spotlight or torch to identify your targets; a bright light also temporarily stuns animals such as rabbits, which will make for an easier shot. You should also choose a scope with a large light intake, which will make for a much clearer and wider field of view. For example, there’s the Hawke Vantage 3-9×50 IR Mil dot reticle scope, and the more powerful 4-12×50 version.

Three Lamping Colours

There are three most popular colours of bulb which are used when lamping or shooting at night, and they all have different pros and cons – all of which are down to personal preference: red, green, or white.

The most popular colour for lamping is a red bulb. This can commonly be seen when driving around back roads at night and you see farmers using these red spotlights across their fields, looking for rabbits or foxes. It’s a popular favourite because the red light doesn’t affect your personal night vision as much as the other colours, and animals are less aware of this bright light being put on them, and so won’t get spooked and run away. The red light can make it quite hard to spot your prey at night if they are in long grass or in the undergrowth, as everything will appear as the same colour. This is still the first choice for any fox or rabbit hunters. You can find a red spot light here – the Tracer LEDRay F400 Red.

The green spotlight is quickly becoming more popular because, like the red light, it has little effect on your own night vision, and with the green light, it’s much easier to identify different targets, because it shows up differently on obstacles – unlike the red, where everything can blur into the same colour. The green light, however, is a lot less popular with shooters after predatory animals like foxes, because they notice this colour a lot more and have been known to run away as soon as the beam is on them. A great example is this, the Tracer LEDRay F400 in Green.

F400 Red Lamp
F400 LED Red Rifle Lamp


Finally, we have the white spot light. This offers the greatest distance for you to shoot at, and makes everything a lot easier to see at night, but it will have the worst effect on your own night vision and will scare predatory animals away the most. However, this is my personal favourite to use when shooting rabbits, as the bright light stuns them for a moment, allowing for a clear shot and clean kill. One white light to try is the Tracer LEDRay F400 in White.

All of the above spotlights, which I have added the links to, are for attaching either onto the gun, or onto the scope – which would be my personal preference when shooting. There are other options available, however, depending on the environment and style in which you will be shooting, such as from a vehicle or with another shooter.

Night Vision Scopes

Another option for night shooting is the use of a night-vision scope. Originally intended for military applications, this is another favourite among hunters, as these night sights are becoming ever more affordable for the everyday shooter.

Check out a range of gun lamps and spotlight options here.  You can also check out our website for more on night vision, including gear by Nitesite and Pulsar. 

How Can I Get A Shotgun Licence?

You may be tempted by the impressive array of shotguns we sell here at Pellpax. Unlike many shotgun retailers online, we can deliver them direct to your door. However, you will need a licence, as it’s a requirement of law here in the UK. We take a look at how you go about acquiring a shotgun certificate here.

A Licence is Essential

A shotgun, under section 1(3) a of the Firearms Act 1968 (as amended), is defined as a smooth bore gun (not being an air weapon); having a bore less than 5.08 cm and a barrel not less than 60.96 Shotguns on Wallcm; having either no magazine or a non-detachable magazine incapable of holding more than two cartridges; and not a revolver gun.

It is a legal requirement that anybody who owns a shotgun or buys a shotgun for sale, must hold an up-to-date licence. A first shotgun licence, valid for five years and issued by the Firearms Licensing Unit of the local police force, can be obtained at a cost of £79.50 on completion of an application form (201) and a follow-up interview with a police officer.

Form 201, application for a firearm and / or a shotgun licence, can be downloaded from various websites, including the BASC (British Association for Shooting and Conservation), and your local police force’s website.

Security & Vital Info

It is good practice to arrange security immediately, ensuring that your locking cabinet, or alternative storage, complies with safety regulations. The application form includes questions about the provision of storage and security – proposed or in place – and the visiting police officer will need to be satisfied that your arrangements are appropriate; the application process can be slowed down by a lack of adequate security measures in place.

When completing form 201, you will be asked to give personal information regarding contact details, previous names and addresses, place and date of birth, nationality, convictions, and place of work. There is a section concerning personal health. It is a legal requirement that the applicant discloses all physical and mental health issues, both current and historical, and the signing of the form gives the police permission to contact the GP in order to verify the information given.

Any person who has known you for at least two years may act as a referee. The referee’s personal details (full name, date of birth, occupation etc) and contact details must be provided, along with four passport-style photographs of the applicant – one of which must be signed by the applicant.

The Next Stage

After four to six weeks, you will receive notification about your application. If this first stage has been successful, a police officer will visit you at your home to discuss safety arrangements – proposed or in place – and your reasons for owning a shotgun. It is perfectly reasonable to say that you want to take part in shooting for sport.

If the officer is satisfied with your security instalment, he will notify the Chief Officer of Police, and your certificate will be issued. If everything else is satisfactory, but your provision for safe storage is not yet in place, your certificate will be hand delivered by a police officer once he has seen, and is satisfied with, your gun security arrangements.

If successful, the certificate you will be issued with will last for 5 years. If you’re unsuccessful, you will receive a letter from the local Chief of Police, with the reason, and detail of the appeals procedure.

You can check out and buy a shotgun for sale from our online store right here. We sell shotgun accessories, too.