Choosing Your Compound Bow

Compound bow
Some of you may have already read our Guide to Choosing Archery Equipment for Pros – even if you have we want to help you with your compound bows too. Despite the mechanical advantage that the cam system provides, a compound bow is still just a tool, and, ultimately, all the power of a shot comes from the archer. The energy in the speeding arrow is transferred from the bow, and the energy stored in the bow is transferred from the archer’s body. Even a ‘powerful’ bow won’t do the work by itself!

What is the Right Draw Weight?

Cam Close up

A compound bow reaches its peak draw weight before full draw. This is due to the letting-off mechanism, which releases much of the pressure at the final stage of the draw. So, the peak draw weight occurs before the bow is fully drawn.

A compound bow’s draw weight is usually adjustable within a range of 10 or 15lbs and is adjusted by tightening or loosening the bolts that join the limbs to the riser. A bow that’s advertised as having a 60lbs draw weight can be adjusted to a draw weight of anything between 50lbs (or possibly 45lbs) and 60lbs. If you’re new to archery, don’t try to shoot with too great a draw weight to begin with. Start on the low side; upper body strength will soon build up with practice.

This is a generalised guide to appropriate draw weight:

  • Children (6-9 years): 10-20 lbs
  • Children (9-12 years): 20-35 lbs
  • Teenagers and smaller women: 35-45 lbs
  • Women: 45-55 lbs
  • Men: 55-70 lbs

How to Measure Draw Length

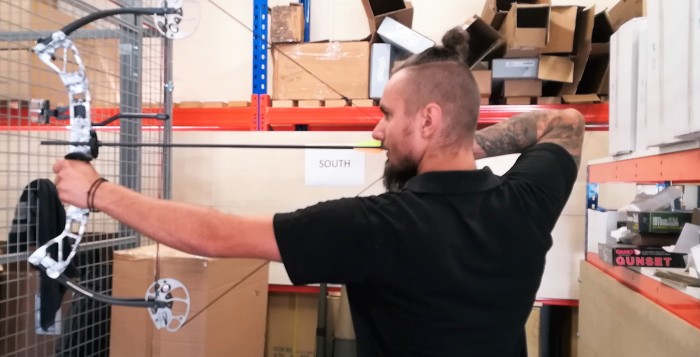
Draw length is the distance between the grip (on the riser) and the centre of the string at full draw. Unlike a traditional bow, a compound bow must be drawn to its maximum capacity, and no further. This means that your compound bow must be the correct draw length for you.

To find out your draw length, use this simple formula:

arm span divided by 2.5

Measure your arm span, which is usually equal to your height, and divide by 2.5. If your arm span is 68”, your draw length will be 28” (68/2.5). If your arm span is 73”, your draw length will be 30” (73/2.5). If your arm span is 60”, your draw length will be 24” (60/2.5) … and so on.

The longer the draw length, the longer the power stroke, which equates to higher arrow velocity. In fact, 1” of draw weight is worth about 10 feet per second (FPS) of arrow speed. A bow’s speed is always tested at 30” draw length. So, if your bow’s speed is advertised as 300 FPS, and your draw length is 25”, you can expect to shoot arrows at a maximum velocity of 250 FPS.

Full draw length with arrow


What is the Brace Height?

A bow’s brace height is the distance between the deepest part of the riser to the string (at rest). A shorter brace height means a longer draw stroke, which means more stored energy.

The brace height is related to the overall draw length. If your draw length is 26”, and your bow has a brace height of 6”, the distance over which you’re actually pulling (and storing energy in the bow) is 20”. A fellow archer, who has a draw length of 28” and a bow of 8” brace height, will also be pulling over a distance of 20”.

Because the other chap’s arrow remains in contact with the bow for longer, his arrow will have more stability. If your bow has a brace height of 8”, your pulling distance will be 18”, and your arrows will be more stable … and they’ll be slightly slower.

Choose Wisely

Does speed really matter?

Yes, of course it does, to a point. But don’t let a desire for speed take priority over comfort, accuracy, and safety. Go with your correct draw length. A slight loss of speed is insignificant when compared to the consistent accuracy that can be achieved with a well-suited bow.

Take a look at our range of Compound Bows here from manufacturers such as Ek Archery and Barnett.

For more information about archery equipment, phone 01263 731 585 and speak to James, our in-house expert.

Alternatively, talk to James on Live Chat at https://www.pellpax.co.uk/

Air Rifle Review – Weihrauch HW95K

Alex James Ross LexSo as well as an archer, I’m also a huge lover of guns, including air rifles, and have spent much of my life doing small game hunting and pest control, both for the control of species that are harmful to farmland, and for the enjoyment of being out in the elements with just my dog by my side and my rifle in my hand. To someone who doesn’t shoot, this sense of freedom when you’re out in a field or woodland after your prey cannot be explained. I’ve had many air rifles come and go in my arsenal, but one of the most impressive has to be my Weihrauch HW95K, fitted with an MTC Mamba 3-12×44 AO IR.

A Light Weihrauch

This is a beautiful rifle, which is well balanced and accurate. Usually Weihrauch air rifles are renowned for being weighty guns, but this is one of the lightest in their range, weighing in at just 3.3kg and making this an easy gun to carry around all day without too much strain on the user. Take a look at our wider Weihrauch range.

I first took this gun down to the range for some setting up and was very impressed with the results. I generally go for air guns in .177 calibre, as I prefer the accuracy of these, along with the extra range and the flatness of the pellets’ trajectory (ideal for hunting). Firstly, I set up a paper target at 30 yards, and once I was getting one-inch groups, extended this range to 50 yards.

For a spring rifle to be getting such tight groups at this range, from a standing position, was very impressive, and I was easily still hitting spinner targets and tin cans on the top and bottom sides with ease. For me this was good enough to take the HW95K to a local farm for some field testing.

For a .177, pellet choice is very important when target shooting, and for overall accuracy you can’t beat a good quality domed head pellet, and so I began by using JSB Exact 4.52. But after a while, I actually found that my rifle preferred Rifle Airgun Ammunition Premium Round for tighter groups. I’ve found over time that the .177 pellet, though accurate, tends to over penetrate your target when shooting vermin, and so if you don’t go for a head shot, you haven’t got much hope of killing your prey, as the pellet passes through too cleanly. I have, however, found the solution to this issue with the incredible Baracuda Hunter Extreme by HnN, which causes enough damage for a clean kill. The last thing I want is to leave an animal wounded.

Easy Rabbit Hunting Rifle

The first rabbit I took with this was at a modest 30 yards (I always go for head shots to ensure a clean kill or a complete miss), and I was a little amazed at how this rifle feels to shoot. With such a crisp and clean shot, it took this first rabbit with ease.

James' Dog hunting

After this, I have had huge success with this rifle at shooting spinning targets, but mostly hunting, where this rifle has not once let me down or had any faults, and with very rarely any misses, all of which were no fault of the rifle.

Over the next 6 months this has now become my rifle of choice for hunting, as I know that pretty much any pest within 60 yards is mine for the taking.

If you’re looking for a no-nonsense, high quality hunting package, check out this link for this rifle fitted with a scope, silencer, sling, bag, and pellets – everything you need to help you get rid of those pests once and for all. And check out how the Weihrauch compares to Hatsan air rifles for hunting.

Fletching Your Arrows

What is Fletching?

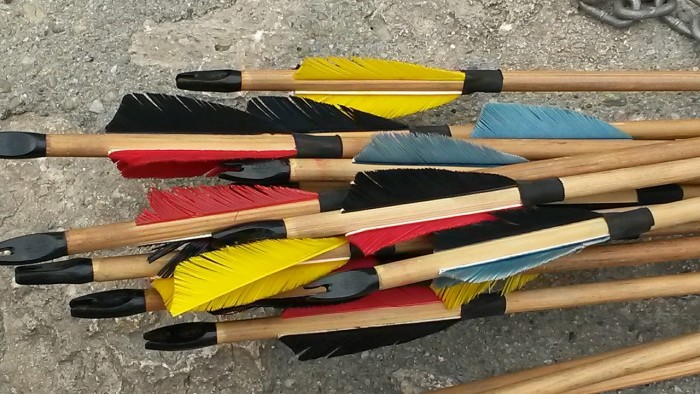
Near to the rear of an arrow, there are three feathers or plastic vanes – two of one colour, and the other in a contrasting colour – collectively called the fletching. The purpose of the fletching is stability. When all is going to plan, and the arrow is flying in a perfectly straight line, the fletches will slice through the air without changing the course of the arrow. If, on the other hand, the arrow is wobbling, and its tail is not perfectly following its tip, it will be brought back into line and stabilised, due to friction between the fletching and the air.

arrows flight close up

For centuries, fletching was made of feathers – after all, they’re nature’s own design, and they obviously work. Despite enormous leaps forward in technological design, feathers are still contenders in a ‘Who’s best?’ contest. In fact, even the new kid on the block, the compound bow, is sometimes spotted shooting arrows with feather fletching.

Understanding the Structure of a Flight

The rigid structure of interlocking barbs and hooks in a primary flight feather is due to a protein called keratin, which allows the feather to retain its shape when wet. Although the right kind of feather will not be ruined by getting wet, it will, nevertheless, be heavier with the added weight of water. But if you’re set on using feather fletching, you can use a waterproofing powder, designed specifically for this purpose.

The rough, latticed surface of a natural feather is second to none when it comes to creating friction with air, and this is a big attribute when it comes to stabilisation. And despite amazing advancements in the science of synthetic materials, no plastic vane is anywhere near as lightweight as a feather.

If you want to learn more about the things to look for when buying archery items, check out our Buyers Guide to Archery for Newbies, or the Buyers Guide to Archery for Pros.

Feather versus Plastic

ek archery arrow flightHowever, the most popular choice of fletching for today’s archer is the inexpensive, durable, waterproof plastic vane. Available in a seemingly endless range of colour and size, these soft, flexible vanes can be easily applied in whichever formation you prefer. Even after a fair amount of rough treatment, they’ll pop back into shape; and if they become really warped, you can usually get them back into shape with a bit of heat treatment – a hair drier is the best thing to use.
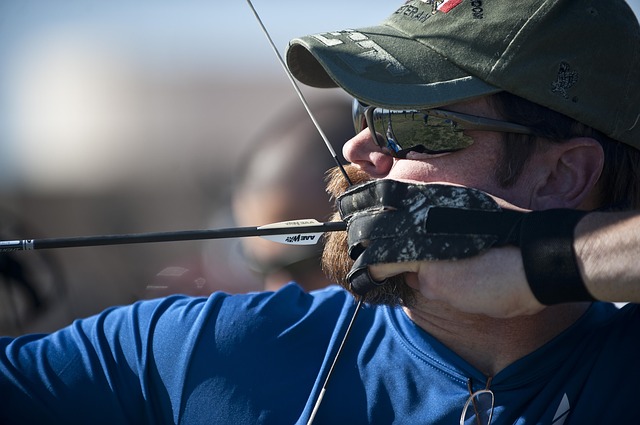
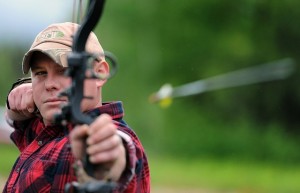
If you choose plastic vane fletching, you must also make a decision about the angle (or turn) of the fletch on the arrow shaft. Will your priority be speed, or accuracy? Will your choice be restricted by the design of your bow?

A straight fletch is affixed to the shaft in a perfectly straight position, running parallel with the shaft itself. The vane slices through the air, causing minimal friction, and therefore no loss of speed. However, because straight fletching prevents the arrow from spinning, the arrow can become unstable and less able to right itself. This disadvantage becomes more significant the further you have to shoot.

The helical fletch is attached to the arrow’s shaft at an angle, and the fletch itself is also curved, creating maximum wind resistance, and therefore plenty of spin. This spin will help to stabilise your arrow in the same way that a pellet is stabilised by the rifling effect of an airgun. Stability, of course, leads to improved accuracy, but the large amount of friction that causes this fast spin will slow your arrow down.

archer and bows

Which Flies Better – Helical or Straight?

The helical formation is really the only option for feather fletching, as it’s just about impossible to force the naturally curved feather into a straight line. Helical fletching is also ideal for bows of low draw weight. With less speed, there is less stability, so the more spin you can get, the better.

But is there a middle road between the straight and the helical fletch? Yes, there is! It’s the offset fletch.

The offset fletch is straight, but it’s turned at an angle on the arrow shaft. This is an effective solution in cases where the arrow rest doesn’t provide enough clearance for helical fletching to pass through. Contact between the arrow rest and the fletching will compromise speed and stability.

In the case of helical or offset fletching, which way should the arrow spin? The answer is, in general, clockwise – to the right, as you look at the arrow from the nock. It’s all to do with the thread of the tip. When the arrow enters the target counter-clockwise, the tip will unscrew; when it goes in clockwise, it will tighten.

To ensure a clockwise spin, make sure that the upper end of the fletch (the end closest to the tip) is offset to the right as you look down on the arrow from the nock end.

Does Size Matter?

Now, what about size? Does it matter? Well, yes, it does.

When shooting over long distances – 100 meters or more – you’ll do well to use fletches of at least 4” long. The further your arrow travels, the more vulnerable it is to instability. Therefore, every bit of surface area in your fletching will count. Whether you choose to use straight, offset, or helical fletching will depend on other variables in your equipment and environment.

Check out our wide range of arrows and bolts, or you can have a read of How to Become a Competitive Archer on our blog

Going On An Archery Day Out For A Stag Do

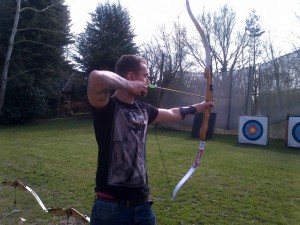
A recurve bow, with sights, in action
An archery day out can be tremendous fun

If you’re planning a stag do and fancy trying something a little different instead of (or in addition to!) the usual strip bar and excessive amounts of alcohol, why not try archery?! Grab a bow and get back to your primal roots with a little friendly competition.

Archery is the ultimate macho man sport, requiring accuracy, power and a keen eye. After all – at one stage bows were the number one weapon of choice for the Army and a pretty effective one they were too! You don’t need any prior skills or knowledge and you tend to stay together for the day, so it really is a great way of everyone getting to know each other.

Perfect for groups big or small, archery is a great way of starting off the weekend, getting the lads together, and having fun before a big night out.  Archery is the perfect stag weekend activity, as it is available up and down the country, and in all weathers – don’t let the rain dampen your day.

Either set it as the main event, or as part of an action packed stag weekend for fun for all.  Most companies will provide all your archery equipment, as well as an instructor to show you the best techniques before setting you off to compete.

There are some companies who offer archery lessons specifically for stag parties, so alongside learning your technique etc, you are pit against one another to find out which members of your team were made to hunt and which are just Maid Marion. Set prizes and forfeits to make it all a little more interesting, and of course dress your stag up for ultimate embarrassment (something cool like Robin Hood if you’re feeling kind, or something completely ridiculous if you’re not!).

Some providers, such as Robin Hood Events offer stag do packages which focus on fun and competition with huge 3D animal targets, a zombie themed area and various mini games and competitions.

It’s important to decide, when looking for a company to host your archery stag event, whether you want silly, competitive fun, or more serious archery lessons with an element of competition.

Different places will offer a different focus and perhaps if you are looking for the latter, just a normal archery club might offer a group discount at a cheaper rate than a stag event specific company. You can check your local area for archery clubs on the Archery GB site.

If you find yourself a bit of an archery natural, or want an original gift for your stag, don’t forget to check out our archery shop to grab the right equipment. And to start planning your archery day out, head to Robin Hood Events, or Stagweb. And head to ArcheryGB to find your local archery club. 

8 Things You Never Knew About Archery

archery-660626_640Thanks to Hawkeye, Disney’s Brave and Katniss Everdeen, Archery is finally being given the recognition it deserves for being a pretty cool sport.
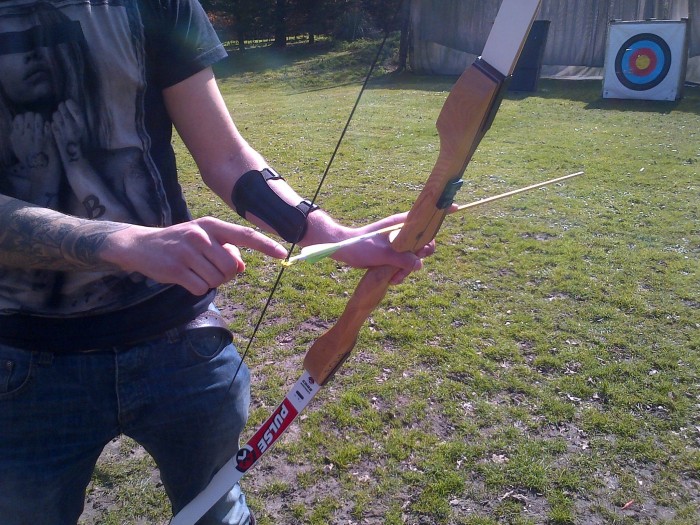
It can be a whole lot of fun from being a beginner learning the ropes, right up to the intense skill and power it takes to partake in competitive archery.

That said, there’s a lot more to archery that meets the eye, so we have compiled some facts about the sport that you may not know!

  1. Archery is the national sport of the Kingdom of Bhutan, a sovereign state in South Asia. Their focus on archery is as a social sport (a little like football is here) and villages compete with each other, making the event full of food, drink and dancing. To add to the lightheartedness of the competitions, competitors are allowed to try to distract the other team whilst they are aiming – something which is almost as enjoyable to watch as the sport itself.


  1. Hawkeye uses a recurve bow in The Avengers, despite the fact that a compound bow would provide much greater power and accuracy. Perhaps it’s because his Hoyt bow looks good on camera, or he’s just showing off, either way he seems to be doing just fine. Maybe he read our How to Choose a Compound Bow guide?!


  1. If you are an archer, you could also be referred to as a “toxophilite” a word which literally means ‘lover of the bow’, and originates from Ancient Greece. The word for archery however, comes from the latin word ‘arcus’ and means ‘bows and arrows’.


  1. To put the level of skill and accuracy needed into perspective, getting within the ‘gold ring’ involves hitting a beermat-sized target from a distance of seven buses – no mean feat! Best grab your archery supplies and get practising!


  1. The recurve bow looks so sleek and modern you could be forgiven for assuming it was a new design, however, it is actually based on designs from over 3500 years ago. There has never been much of a need to update the design as it works well – if it ain’t broke, don’t try to fix it!


  1. Geena Davis, of Thelma and Louise fame, was a skilled archer and ranked 24th of the whole US women’s archery championship in 1999. She narrowly missed out on her dream of being representing the national team team in a major international event, but she did win an Oscar.


  1. Archery isn’t just a sport. In Japan they perform Kyudo, which is a style of archery, as more of an art form than a sporting activity.


  1. If you manage to perform a rather impressive feat of splitting the arrow of your competitor, this is known as ‘Robin Hood’ and is incredibly difficult.


If this list has whet your appetite for learning archery or improving your archery skills, don’t forget to stay tuned to our blog. It’s the perfect time to set yourself a ‘target’ of mastering a new sport!

How To Get Your Children & Family Into Archery

This summer, why not grab a kids bow and arrow set, and whisk your youngsters away from their computers and out into the open (weather permitting of course!). Spend some times together learning archery for kids and the whole family! Whether you’re feeling inspired from the Summer sporting events or have a budding Katniss/Hawkeye in your house, archery really is the perfect family sport.

Archery is a fun day out for the family

Why is archery for kids a great sport?

Archery doesn’t require a lot of cardio fitness, but is great for building muscle strength as well as focussing the mind and improving concentration and patience – who couldn’t use a little more of that?! It is also a great activity for including disabled members of the family as there are a whole host of variations they can implement to be able to join in.

It’s a sociable activity and a whole lot of fun! Of course, there is a competitive element, whether that’s within your group, or on a National level, but after all, isn’t that part of the appeal?!

In the past, like many things, archery was incredibly male-dominated, with King Edward III ruling that all boys from the age of 14 should be able to master the longbow. That said, there is nothing to suggest that the girls in your family couldn’t become archery masters – why not stir up a little healthy competition to hit those archery targets, boys vs girls and the losers have to do the washing up for a week?  

The different types of Archery for kids and families

Although you are most likely to be thinking of Target archery when the word ‘archery’ comes up, there are actually a whole host of different forms of archery to explore.

Target Archery – The aim of this type of archery is to get as close to the bullseye on the target as possible. Any of the ten rings will give you points however, and they all add up! Target archery can be played indoors or outdoors so it is a pretty safe bet when it comes to learning archery.

Clout Archery – The target of Clout archery is to get your arrow as close to a flag in the ground as possible, with different landing areas being worth varying points. In Clout archery you are stood much further away from the target and it tends to be set up outside.   

Flight Archery – Flight archery requires participants to get their arrows as far away from them as possible. This is usually done in aerodromes as it requires a large distance and no interference from pesky winds. Although not as common as Target or Clout archery, it is a whole lot of fun.

Field Archery – The most like the Hungergames, Field archery uses a longbow and is often done in woodlands or other outdoor areas. The archery targets used can vary from 3d targets to paper animal targets.

It’s great to try the different styles of archery over time, however, when your family are just learning, Target and Cloud are the most popular.

If you just want to test the waters, many clubs do “give it a go” or taster sessions at open days of their clubs, or even local events. If it is something that you can really see yourselves getting into, it is worth investing in the necessary equipment such as bows, arrows and of course targets. You can also get specific kids bow and arrow sets, too. To find out more about the sport, or find your local Archery club, head over to ArcheryGB. 

How To Become A Competitive Archer

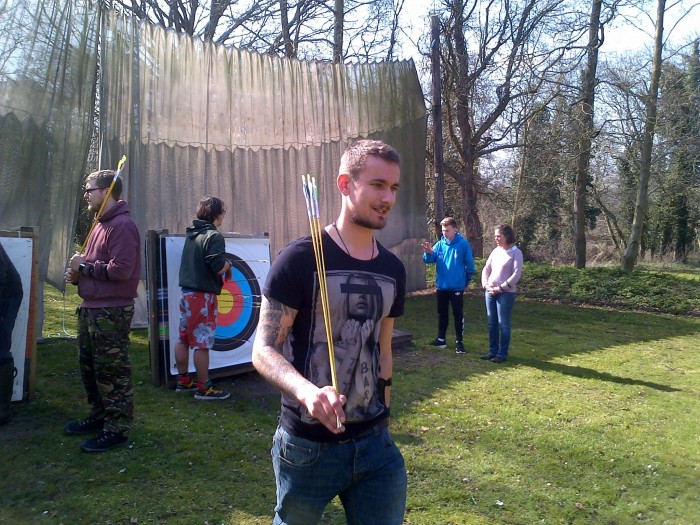
Our very own James carrying arrows back from the target.

Given that this summer is a turning out to be a wonderful season for sport, such as the Archery World Cup in Odense later this year, we decided to take a closer look at how you can join your sporting heroes and become a competitive archer……

Types Of Competitive Archery – Target Archery

First of all, it’s important to note that there are several different types of competitive archery. There’s World Archery Federation rules, formerly known as Federation Internationale de Tir a l’Arc or FITA style archery. WA rules are covered by ArcheryGB in the UK. This is what is used in major international tournaments like the Commonwealth Games, and it comes under the bracket of modern ‘Target Archery’.

This type of archery is relatively new in the lineage of this historic sport, and comes in different forms. WA archery can take place in indoor competitive spares or outdoors, with the former taking place over distances of 18 to 25 metres. Outdoor competitions vary in distance from 30 through to 90 metres. Two types of bows are typically used, either recurve or compound bows.

The competition is divided up into what are known as ‘ends’, sets of arrows which are fired in groups of 3 to 6,  and within a fixed amount of time. The targets they are aiming for are made up of 10 circles arranged inside one another, and valued from one through to ten. The central ring is also known as the X ring, and is valued at 10.

The base for archery targets is made up of cloth stuffed bags or foam. They vary in diameter, from 40 centimeters, which is used in 18 metres indoor competitions, to 122 centimeters, which is used in 70 to 90 meters WA competitions, such as the Commonwealth games and other major sporting events.

Field Archery

This form of competitive archery harks back to older versions of the sport, and as such, takes place outside, often in territory which is unmarked, over a variety of distances. The major body governing this sport is NFAS (National Field Archery Society) in the UK, and NFAA in the USA.

NFAS operate their competitions typically in woodland, over distances which are unknown, and aimed at 3d targets and paper animal targets. They use 10 types of bow, including longbow, crossbow, compound limited and barebow, and cover adult, junior and under 12s, holding events up and down the UK.

Clout Archery

This runs along GNAS (Grand National Archery Society a.k.a ArcheryGB) rules in the United Kingdom. It’s similar to traditional target archery.

The basic idea is to drop arrows over a long distance into a series of circles, arranged inside one another, around a flag which marks the centre. The Clout in the name consists of the 36 arrows which

A recurve bow, with sights, in action

are fired in a group, as part of the competition.

Getting Involved

Unsurprisingly, the best way to get involved with competitions is via the relevant UK body. ArcheryGB has 45,000 members and represents 1,300 clubs. It is the national governing body for the sport from grass roots to elite competition level, and runs a variety of courses from beginners to coaching and advanced level. To get started, you can use their Club Finder. These provide a good starting point for both recreational and competitive archery. There is support for disabled archers.

Meanwhile, NFAS focuses on promoting traditional field archery as a sport, from shooting events, all the way up to coach training and competitions. As with ArcheryGB, you can apply to be a member on their website.

Grab Your Gear

Archery equipment can be hired from a variety of sources if you just want a taste – clubs can often help with this. Those who wish to commit to the sport will find affordable entry level equipment for around £100 to £300, with second hand equipment also available from a variety of sources (it’s best to have this checked by a professional before purchasing). You can contact our staff via telephone or email for advice on what archery supplies to get.

James from the Pellpax team takes aim

Stay Informed

In order to become the best, you’ll need to keep up to date with the biggest names and the best writing on archery. We regularly publish archery content here at Pellpax on our blog, and you can also head to the ArcheryGB website, which is regularly updated with news about the sport. They also produce Archery UK, their own magazine. Then there’s Archery360, which produces great content, and Bow International, another fantastic resource for archers.

Events

For a calendar of the big sporting events this year, including the World Archery Cup, which takes place in Odense in September, check out this guide provided by the World Archery Federation. Big events also take place in Dublin, Marrakesh, Bangkok, Shanghai and Las Vegas in 2016, too.

Stay tuned to our blog to learn about all things archery-related. And grab all your archery supplies from compound and recurve bows, to archery targets, quivers and more, in our archery store. 

Top Tips For Shooting A Recurve Bow

Are you thinking about getting into archery? Our resident archery enthusiast James gives us his advice on how to fire a recurve bow.

archery-660632_640
Target archers use aids like sights to help them achieve the perfect shot

In my experience, there are various different ways in which you can shoot a bow depending on your style of archery. For instance, an archer using bare bow style, a recurve without the use of sights, counterweights etc, may “snap shoot” where you use very little time to actually aim at the desired target but instead instinctively “feel” the shot.

A target archer using sights however, will take more time and think about where the arrow is going, ensuring all the possibilities that could make the shot go wrong are limited by using the same methods every time, such as draw length, stability, a smooth release etc..

Here I am going to cover some of the basic techniques that are required when shooting with a recurve bow. These are basic tips to help you achieve a consistent level of archery so if you use sights or shoot bare bow style, this advice should hopefully help you get you on your way to successful shooting.

Your Archery Stance

One of the first things to consider after you’ve got your archery supplies, when shooting any bow, is the way in which you stand when doing so. You should be standing sideways on towards the target, with your feet shoulder width apart. This will give you stability when shooting and ensure you are able to get the most power out of your shot, for you will now be drawing the bowstring straight across your body to your draw point.

Holding the Bow

It is important that you hold the bow correctly because this can have a huge impact on the shot you are taking. Personally, I don’t use an armguard when shooting, and I would recommend this to any beginner. This is because as long as you have you arm in the correct position when shooting; the bow string won’t hit your arm.

If your hold is incorrect, you arm will feel the recoil of the string, and this can become quite painful over time, as your arms becomes more sore. In this way, bad technique is punished, and you are encouraged to get it right. Instead, the right way is to not to have your arm dead straight, but in fact with a slight bend at the elbow and locking this position in place.

Gripping the Riser

Another thing to consider is how hard you need to grip the bow. If you are clutching the riser for dear life then this can dramatically throw the arrow off to either side of the target. This is to do with how the energy from the bow is displaced and when held too tightly the energy from releasing the string will all be put into the back of the arrow making it “fish tail” thus loosing accuracy.

This is why many target archers will use finger or wrist slings, so the bow may be gripped ever so lightly and allowed to dip forward after every shot without dropping the bow.

archery-660626_640
It’s important to get your drawing technique right

The Draw 

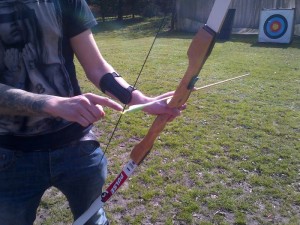
As a budding archer, you must decide for yourself the most comfortable way to draw the string back, and there are various schools of thought on this. Many who teach archery to people will say to put three fingers under the arrow because this is the easiest way of doing so (Three fingers being your index, middle and ring finger).

A better and more widely used method by both target archers and hunters is to “split” your fingers by having one above and two below. This is where the index finger is above where the arrow is on the string with the middle and ring finger below. Also, your fingers will need to be gripping the string at your first knuckle to ensure you aren’t holding too loose or too firmly.

Bare Bow vs Target Archery Drawing

When it comes to drawing, the differences in target and bare bow recurve shooting become starkly apparent. As a barebow shooter, with the bow lightly held in place, you will draw to the side of your face so as to almost touch your cheek with your fingertips, looking down the arrow towards the archery target you wish to hit.

A target archer however will use a different technique where you will draw the bow under your chin so your fingers use your chin as an “anchor-point” and the bowstring touches your nose. This is so that the archer may use the sight to aim at the target before shooting.

Another thing to consider when drawing is to keep your elbow on the arm which is drawing the string held nice and high, as this will make it easier when releasing the shot to keep power.

Releasing The Bow String

Whatever style of shooting, a good release is essential to ensuring a powerful and accurate shot. If on releasing the string you simply let go of the string and let your hand follow the shot, a lot of power will be lost each time. The likely result will be either that the arrow hits low on the target and without much consistency, or that you miss the target altogether.

Instead, ideally, you want a powerful release. So when you are lined up and ready to shoot the arrow when letting go of the string, you should “flick” your fingers off. This is done by releasing the string whilst at the same time moving your hand backwards away from the bow. Imagine you were plucking a guitar string or pinging an elastic band. This will ensure all the energy from the bow is put into shooting the arrow powerfully and accurately.

Keep Holding On

Upon release it is also important that you continue to hold your bow up until the arrow actually hits the target. If you were to just let your arm drop as soon as you release the string you will find that most of your shots when doing so will shoot low on the target or even miss under the archery target. So it is very important to let the shot follow through until it reaches its destination.

Finally

I can’t tell you what exact technique is going to work for you, because we all differ. It is impossible to generalise, and there are too many variables in archery. I wish it could be worked out, as this would have helped me a great deal when I was learning! Instead, what I have given you here are guidelines to which, if implemented, will help you to progress. In order to make the most of these, you will need to practice, apply yourself, and try different methods. With some effort, you should find what works for you, and gives the best results when shooting.

To check out our full range of recurve bows and accessories, head to our archery supplies store. 

Review: Buck Trail Blackhawk Recurve Bow

Our resident archery expert James Hancock gives his verdict on the Buck Trail Blackhawk….

From personal experience of these bows, having shot both the 30# and 40# versions, it is clear to me that the Buck Trail Blackhawk represents true value for money, and I can highly recommend them to any archer who enjoys traditional shooting at a very affordable price.

Long & Fast

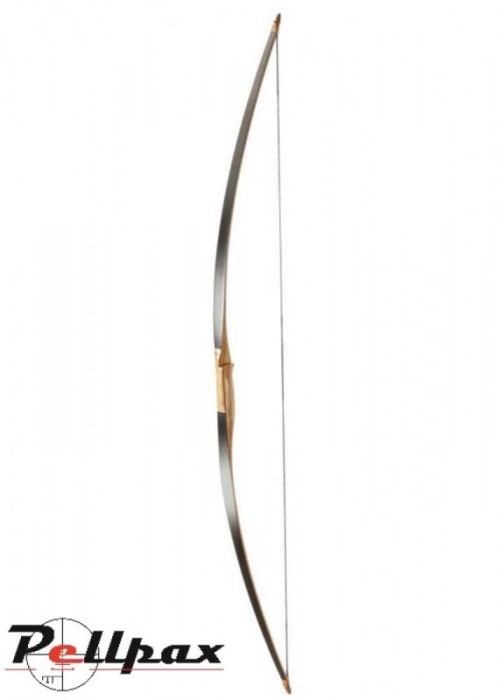
The Buck Trail Blackhawk is an American style Flatbow made by Raven Archery. The overall length of the bow is a huge 68 inches, and this provides the shooter with a very long and smooth draw, which delivers an arrow to the target with great speed, but little hand-shock.

It is designed to be shot off the shelf, using either a leather pad or hair rest, and constructed from multiple wooden laminations, with clear glass over the limbs. This is in keeping with the traditional look of the bow.

My personal opinion on shooting this bow would be to use a style of shooting called “canting the bow”. This is where the shooter leans the bow so that the arrow is sitting on an almost “v” shape. This is a great technique, used by many bare bow archers because it is a quick way of moving the bow out of the archers line of sight, so he may line up the shot, as well as adding stability to the arrow and making it a lot easier to shoot the arrows quickly (snap shooting).

Available in Different Configurations

Available in both left and right handed and with a draw weight range from 30-50# this is a versatile bow which can be used for everything from field archery competitions, to hunting (as appropriate according to the law in your country). I think the draw weights around the 50# mark are much better to use, providing you are able to draw these, since the arch of the arrow isn’t as much as the weaker powered bows. This is because the higher the power, the flatter the trajectory of the arrow, which will make your shooting a lot more accurate than a bow which you have to aim well above the target at longer ranges.

buck-trail-blackhawk-1289
The Buck Trail Blackhawk, a versatile recurve bow

Arrow Selection

The best arrows to be shot with this style of bows to maintain its accuracy and smoothness would either be wooden or aluminium arrows.  My personal preference would be wooden arrows with feathers on them rather than plastic vanes, but an aluminium arrow would shoot well from these as well. Carbon arrows can be quite unforgiving to shoot due to their lightness and speed which is why they are better suited to more precision shooting such as with a recurve or compound with sights.

Personally I would make my own wooden arrows because there is great satisfaction when you have put in the time and effort into making something which looks quite often better than those you can just buy, and they shoot great! At Pellpax we can supply all the materials you will need to build your arrows from the wooden shafts themselves to the arrow points and feathers.

Essential Bow Accessories

A few more things to consider when purchasing this bow. There are certain accessories every archer will need to get at some point such as finger protection from the string, an arm guard again to protect you from the string, and a quiver to hold your arrows for you whilst you are shooting.

I would personally suggest that any beginner archer should use an arm guard until you have worked out a good enough technique to not need one (although the string can still catch you!). I don’t really like using arm guards, as I find if the string hits me then it’s a tough reminder that my technique is flawed, and I need to bend my arm more.

My personal equipment preference would be to keep with the traditional theme, and get a leather shooting glove rather than a tab. This is because they not only protect your fingers, but keep your hand warm when winter shooting, are easy to use, and they look great.

In terms of a quiver, I love to use a back quiver, much like you see in every Hollywood film where there is a bit of archery. Many people struggle to get their head around how to use one of these and end up chasing around after their arrows like a cat after their tail, so for beginners it may be better to go for a side quiver instead, which can simply click onto any belt.

In conclusion, found the Buck Trail Blackhawk to be excellent value, due to its sheer quality, and I would recommend it as great bow for entry level and intermediate archers.

If you would like to see our range arrows click here, and for arrow building materials click hereA lot more arrow-making supplies are available, so if you have anything in mind which you particularly need and cannot see on here, then please feel free to contact one of our staff and raise your enquiry.

We sell the Buck Trail Blackhawk, in a variety of configurations, at the low price of £112.99.  They can be found here. 

For all items suggested above, you can go to the head to the Archery Accessories section. And you can browse our entire catalogue, in our archery shop.

How To Get Started With Clay Pigeon Shooting

You don’t own a gun. You have never fired a gun. You have no gun licence. You don’t know how to obtain a licence. You don’t know if you need a licence. You don’t know anybody who shoots. So how do you get started with clay pigeon shooting?

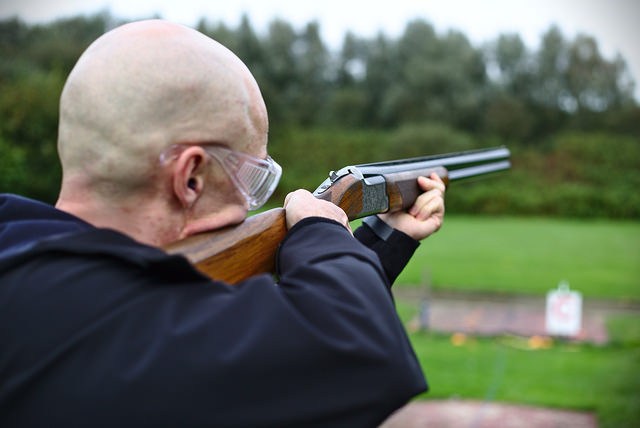
Clay Pigeon Shooting. Credit: Dennis van Zuijlekom, 'Barrage'.
Clay Pigeon Shooting. Credit: Dennis van Zuijlekom, ‘Barrage’.

When you attend your introductory shooting lesson, you don’t need a licence or a gun of your own. Current legislation allows an unlicensed person to borrow a gun belonging to the occupier (not necessarily the owner, but a licensed person) of privately owned land, in his or her presence.

Do I need a licence?

However, it is a legal requirement that anybody who owns a shotgun must hold an up-to-date licence. A first shotgun licence, valid for five years and issued by the Firearms Licensing Unit of the local police force, can be obtained at a cost of £79.50 on completion of an application form (201) and a follow-up interview with a police officer. Form 201, application for a firearm and / or a shotgun licence, can be downloaded from various websites, including the BASC (British Association for Shooting and Conservation), Shooting UK (a popular UK shooting website), and your local police force’s website. A shotgun licence application can take months – or as little as three weeks; it depends on whereabouts in the country you live. We’ve written a detailed blog post on the topic here.

Where can I practise clay pigeon shooting?

trap clay pigeon shooting club
Clay Pigeon Trap Shooting can be found in local clubs around the country.

There are over 500 clay pigeon shooting clubs in the UK, including 11 in Norfolk. You can find your local club by heading over to the Clay Pigeon Shooting Association. Check out our site for all your shooting accessories. Contact a club near you and book yourself onto a clay pigeon shooter beginner’s session, where you will be coached in technique, gun safety, site safety … and jargon, of course!

As a beginner, you will use a gun with a fitted recoil pad. Recoil (also known as knockback, kickback or kick) is the backward momentum of the gun when it is discharged. Being of equal force to the projectile (plus any ejected gases), the recoil is, understandably, quite a shock for a first-time shooter. Recoil pads are made from a soft material, e.g. rubber or leather, and are attached to the buttstock of the gun or strapped onto the shooter’s shoulder, which also serves to prevent the gun from slipping on clothing.

And what about clothing and essential shooting supplies?

Wear comfortable, safe shoes. Wellington boots are ideal in wet weather, and in drier conditions, walking boots or trainers are suitable. Ensure that laces are securely tied. Well-fitting clothes are essential. Tight clothing will obviously restrict movement, but baggy clothing, too, is restrictive in its tendency to get in the way.

The wearing of adequate and effective eye protection by shooters and trappers is now mandatory. It’s possible to wear additional eye protection over the top of prescription glasses; however, many people find this physically uncomfortable and a visual hindrance. As glasses are considered ‘adequate and effective’ protection, people often choose to wear either their own glasses or special eye protection.

It is advisable to wear some form of hearing protection is also compulsory when clay pigeon shooting. A discharging gun is extremely loud, and eardrum damage is irreversible. Check out advice from the Clay Pigeon Shooting Association for more advice on the exact guidelines;

You can find the BASC website here to get your Form 201. Detailed instructions on how to apply for a certificate can be found here. And guidance from the Clay Pigeon Shooting Association is available here

If you already have your certificate, you can grab shooting supplies in our Shotgun store, and shooting accessories such as shotgun cartridges here.

And head to the Clay Pigeon Shooting Association, where you can find a club near you.